How to Install Composite Decking
Homeowners with decent DIY skills can usually install composite decking themselves if they choose. Since each decking brand may be slightly different, it is very important to follow the manufacturer’s instructions. Remember also that the tools and fasteners you use for a composite deck may differ from those you would use for a wood deck.
It is also important to be aware of thermal expansion and allow for proper spacing between the boards so they can contract and expand with the changing climate without buckling.
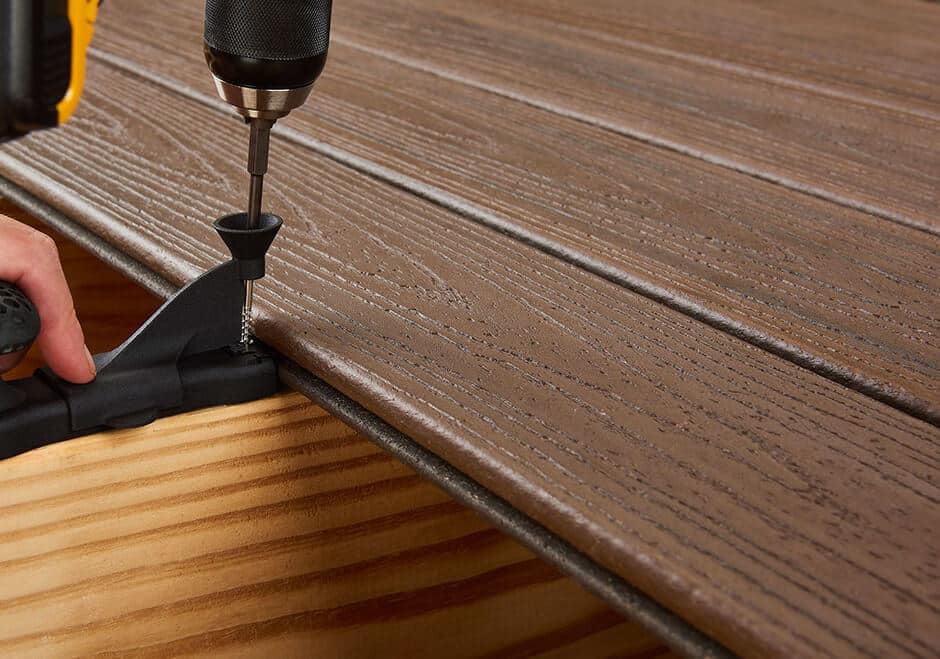
Some brands of composite decking boards are installed with hidden clip systems or fasteners. These fasteners are usually screwed into the frame of your deck across the joists, fitting tightly into the cavity that runs down the side of each board.
Using reverse thread screws to face-screw the boards, it will help to prevent mushrooming – a phenomenon that occurs when a screw pulls some of the composite material upward during installation resulting in a raised bump on the board.
If you are using hollow composite decking products, you could be left with open ends that will be prone to collect dirt and debris – and, frankly, don’t look very nice. Some hollow product manufacturers also offer end caps to close off these ends. Another option is to install a type of “frame” around the outside of your deck that covers up these ends. At Hickory Dickory Decks, we use a trim board on all of our decks, so no end cuts ever show.
Controlling Deck Seams
For the best results, you will want to avoid seams on your deck’s surface, as this will help prevent warping as your deck ages. Depending on how large your deck is and its shape, avoiding seams may be very simple – or you may have to make some adjustments to the design.
One option is to apply the decking boards diagonally to reduce or eliminate butt joists that are more than 20’ wide. Alternatively, you may find it easier to create one continuous seam using a division board – making it appear that the seam is part of your design. A border could also be created around the entire deck.
Step by Step Installing Composite Decking
- Measure the deck to get the length of the first plank.
- Cut the plank to length using a circular or power mitre saw.
- If required, cut a hole in the plank for a downspout using a jigsaw.
- Place the plank on the deck and slip it under any metal flashing using a putty knife.
- Ensure that the deck board is parallel to the outer edge of the deck.
- Secure the board with decking screws along the edge closest to the house. There should be one screw per joist.
- Use a hidden fastener on the edge of each plank. There should be one fastener per joist. Using a tapping block and hammer, drive the fasteners into the edge of each plank.
- Drive one screw into each fastener and the joists using a drill or screwdriver.
- Cut the next plank to length and attach it to the hidden fasteners in the first plank using a 2×4 tapping block and sledgehammer.
- Continue laying planks across the deck using this method.
- On the outside edge of the deck, create notches as necessary for the railing posts.
- When installing the final plank, remove the spikes from one side of the hidden fasteners using end nippers.
- Install the final plank using composite decking screws.
- Snap chalk line across deck boards.
- Create a saw guide by screwing a straight-edged board to the deck.
And finally, enjoy your deck!


